This is the documentation for ConfiForms Server/Data Center app
However, this might also work for ConfiForms cloud and in most cases it does. But please see this page to understand the differences between server and cloud versions of the ConfiForms app.
In this tutorial you will learn how to create Jira issues with ConfiForms, in Confluence
This tutorial is quite technical...
- You need to understand the basic concepts of ConfiForms first
- You need to know what is JSON format and what is API
- Your Confluence server must have an application link to Jira configured
Good tutorials and helping materials
- Virtual functions - to help with transforming ConfiForms values into the format Jira expects
- Accessing field values and properties - documents properties each field type has in ConfiForms
- https://developer.atlassian.com/server/jira/platform/jira-rest-api-examples/ - examples on how to create Jira issues with Atlassian Jira REST APIs with data field types and expected formats
- https://wiki.vertuna.com/label/TEST/jira - various examples on how to create Jira issues from ConfiForms using application link connection (and actions like Create/Update Jira and using WebServices connection IFTTT actions utilizing Jira APIs)
- What Jira expects - Discovering meta data for Jira fields https://developer.atlassian.com/server/jira/platform/jira-rest-api-example-discovering-meta-data-for-creating-issues-6291669/
Since ConfiForms version 2.12
- Experimental service for Jira issue fields discovery to help you with ConfiForms to Jira mappings to create Jira issues
For discovery service documentation
|
Examples:
For web service connection
|
For applink
|
This service is also available through the link from IFTTT macro that creates/updates Jira issue
Since ConfiForms version 3.4.0
ConfiForms has a new feature to help you with your initial JSON mappings - a Jira Helper
See it's in action
Quick tutorial
If you are new to ConfiForms, please take a few minutes to read the Basic concepts Guide, or go through the video tutorial on that page.
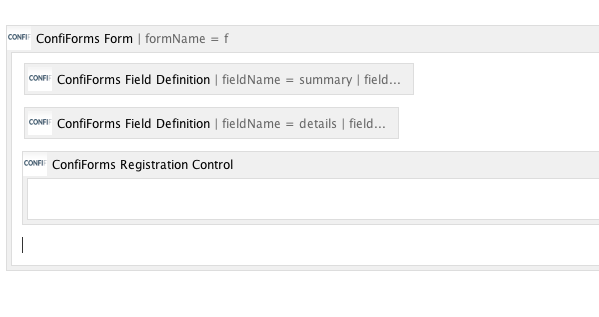
Let's start with the form definition. We will create a very simple form with just two fields (field definitions):
- summary - of text type
- details - of textarea type
If you want to setup a similar thing to accept entries and create Jira issues from anonymous users then take a look at a demo Create Jira issue with webservice connection (available with complete storage format for you to import)
Add default "ConfiForms Registration Control"
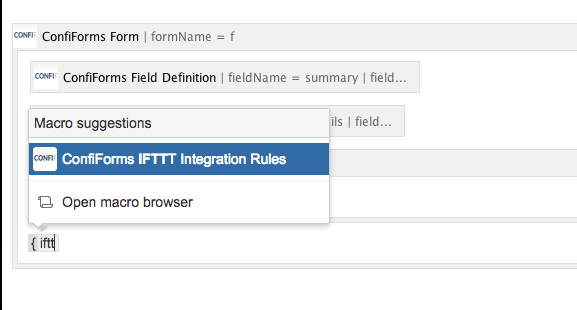
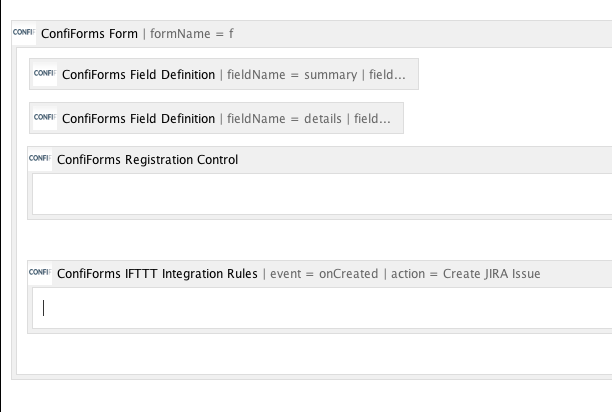
Add "ConfiForms IFTTT macro" and choose option to create Jira issue as IFTTT action.
You can set additional watches to the issue what will be created, but in this tutorial we omit this step (see IFTTT macro parameter "watchers"). Could be set dynamically, referencing entry fields or record owner or modifier.
For IFTTT macro body you will need to put some data in JSON format, as Jira expects it.
You can learn more about Jira API and creating Jira issues using it's API's here: https://developer.atlassian.com/jiradev/jira-apis/jira-rest-apis/jira-rest-api-tutorials/jira-rest-api-example-create-issue#JIRARESTAPIExample-CreateIssue-Exampleofcreatinganissueusingprojectkeysandfieldnames.
Very useful page to see how various Jira field types shall be mapped
https://developer.atlassian.com/server/jira/platform/jira-rest-api-examples/
Basically what you see there in "Data" section is something you have to put as IFTTT body. Look at helper functions, which will help you to make some necessary escaping/data transformations: Virtual functions
{
    "fields": {
       "project":
       {
          "key": "TEST"
       },
       "summary": "REST ye merry gentlemen.",
       "description": "Creating of an issue using project keys and issue type names using the REST API",
       "issuetype": {
          "name": "Bug"
       }
   }
}
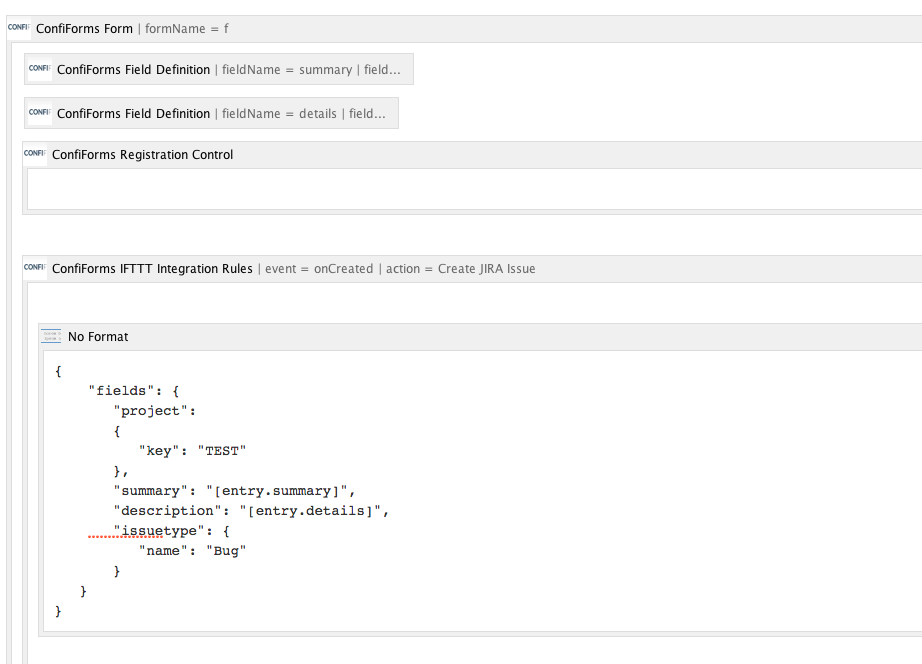
You can use "No Format macro" inside the IFTTT macro body to fix possible formatting issues with Confluence editor, like this:
{
    "fields": {
       "project":
       {
          "key": "TEST"
       },
       "summary": "REST ye merry gentlemen.",
       "description": "Creating of an issue using project keys and issue type names using the REST API",
       "issuetype": {
          "name": "Bug"
       }
   }
}
So we do the following:
[entry.summary] and [entry.details] will be substituted by ConfiForms IFTTT macro before sending the data to Jira
Update
If using NoFormat macro gives rendering exception in ConfiForms then please remove NoFormat macro and place your JSON directly into the IFTTT macro body. If you have troubles with Confluence editor you can try to work in raw storage format using this plugin https://marketplace.atlassian.com/plugins/com.atlassian.confluence.plugins.editor.confluence-source-editor (by Atlassian). Provided JSON should not include any styling information - this is very important for this integration to work.
Important!
For the fields, which may accept line brakes (new lines), like textarea, wysiwyg editor, you will nee to use a Virtual functions escapeJSON in order to make this mappings between Jira and ConfiForms to work
...
"description" : "[entry.details.escapeJSON]"
...
Attaching files to Jira issue
Since version 1.15 of ConfiForms you are now able to send attachments to Jira from ConfiForms when creating a Jira issue
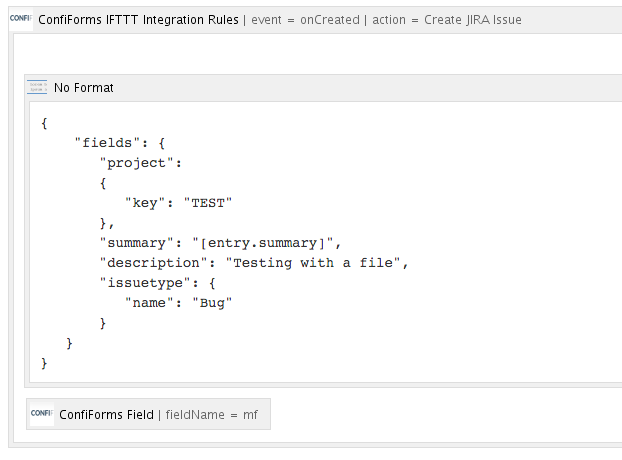
As simple as dropping "file type" field into IFTTT macro body
In this example above "mf" is the file type field in ConfiForms.
Update
Most often when an issue is created you want to know it's KEY and probably saved it back to ConfiForms record
Which is totally possible. The same concept is used as described here: Creating links in original ConfiForms entry to just created page
The KEY is held in the result variable of IFTTT macro execution and it's name totally depends on how many IFTTT's you have on this event
Let's say you have just one IFTTT handler which creates a Jira issue - then the variable holding the result will be ${iftttResult_0} (indexing starts from 0)
From ConfiForms 2.12 you can access IFTTT Result via [iftttResult_IDX] notation. This is an alternative to Velocity style ${iftttResult_IDX}
Comes very handy when you have Velocity templating turned off in ConfiForms settings
So it is a matter of configuring another IFTTT which will take this result and set it back to some field on your ConfiForms record. See the above mentioned tutorial (Creating links in original ConfiForms entry to just created page) on how to update the record back with data from IFTTT macro execution
Please, wbe aware that if you set the IFTTT to create a Jira issue to run in silent mode (not reporting errors), then the result might be empty... So, according to velocity syntax it is wise to access it like this $!{iftttResult_0}
Important
Please note that, by default, the IFTTT to create Jira issue via application link does not create remote link!
You can do it yourself, by defining another IFTTT (it can be either configured to use web connection or application link service)
See an example on how to do it with web connection (doing this using application link service is absolutely the same, just another IFTTT type to select)
Create Jira issue with webservice connection with files and remote links (Storage format for the demo: Create Jira issue with webservice connection with files and remote links - storage format)
Please have a look at the following section:
<ac:structured-macro ac:macro-id="d4d6ee84-0f33-4713-b0c4-04baad175345" ac:name="confiform-ifttt" ac:schema-version="1">
      <ac:parameter ac:name="action">WebService Request</ac:parameter>
      <ac:parameter ac:name="extras">4bb4c41a51f289a07507d50a1b841a4d</ac:parameter>
      <ac:parameter ac:name="event">onCreated</ac:parameter>
      <ac:parameter ac:name="title">/rest/api/latest/issue/[entry.jk.asJSON.key]/remotelink</ac:parameter>
      <ac:parameter ac:name="additionalContext">file</ac:parameter>
      <ac:parameter ac:name="extras2">X-Atlassian-Token: no-check;</ac:parameter>
      <ac:parameter ac:name="who">POST</ac:parameter>
      <ac:rich-text-body>
        <ac:structured-macro ac:macro-id="56a89f71-7d60-496a-ab45-2d6f6db4bd34" ac:name="noformat" ac:schema-version="1">
          <ac:plain-text-body><![CDATA[{
    "object": {
        "url":"https://wiki.vertuna.com/pages/viewpage.action?pageId=19104427",
        "title":"[entry._page.title.escapeJSON]"
    }
}]]></ac:plain-text-body>
        </ac:structured-macro>
      </ac:rich-text-body>
    </ac:structured-macro>
  </ac:rich-text-body>
</ac:structured-macro>
Important note: the operation in NOT TRANSACTIONAL, this means that the ConfiForms record save operation and creation of Jira issue is not run in the same transaction and if Jira issue creation fails the ConfiForms record could still be created.
In general all the IFTTT integration operations are not transactional and executed in own scope, independently from ConfiForms internal operations
