This is the documentation for ConfiForms Server/Data Center app
However, this might also work for ConfiForms cloud and in most cases it does. But please see this page to understand the differences between server and cloud versions of the ConfiForms app.
In this tutorial you will learn how to use newly available feature called "use proxy" with dynamic dropdown fields in ConfiForms
This tutorial shows you to to use the new feature of ConfiForms app DATA CENTER available since version 2.7.0.
"Use proxy" setting is available for
- Dynamic Dropdown (auto-suggest) - Database
- Dynamic Dropdown (auto-suggest) - Webservice
- Webservice Object Referencing Field (added in 3.3.2)
- Webservice Dynamic Multi-label (added in 3.3.2)
Enabling this option for your field helps you to setup a tunnel / proxy to the underlying service to make the lookups. When the option is enabled, ConfiForms doe snot need to load all the choices in advance, which speeds up the form rendering times dramatically and allows to setup fields that can have millions of choices (as much as the underlying service has to offer)
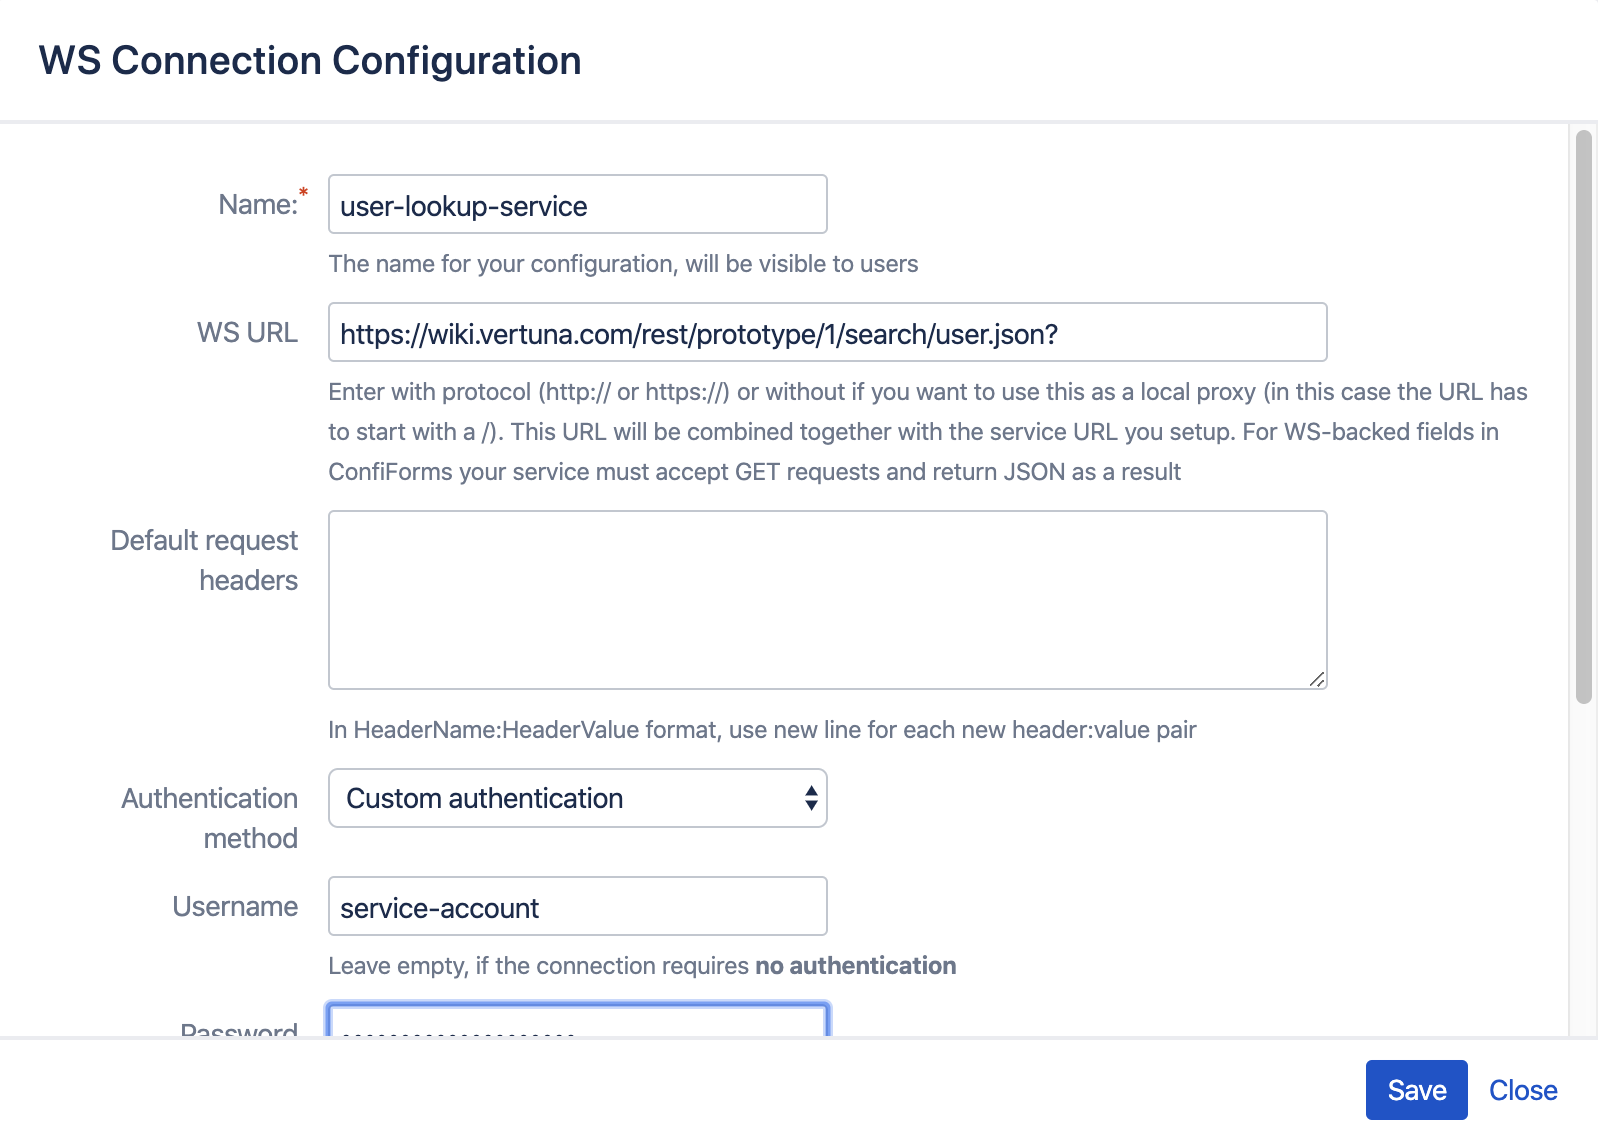
This example is based on the API available in Confluence to lookup users by names
/rest/prototype/1/search/user.json?query=<PARAM>
This is the service used by Confluence user picker (and ConfiForms user field) and we will do the same functionality, but using the "Dynamic Dropdown (auto-suggest) - Webservice" field
First, we need to setup a web service connection for ConfiForms to use.
This can be done by your Confluence system administrators and is configured in the plugin configuration. Direct link is https://<your_server>/admin/vertuna/confiforms/config.action
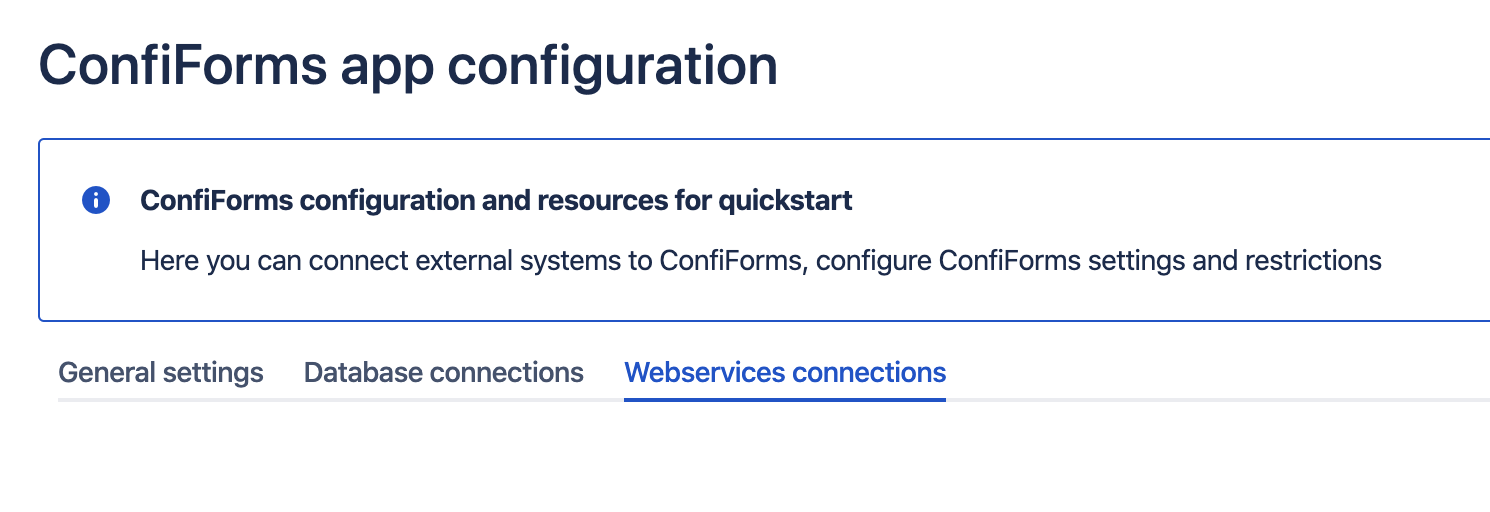
And creating new webservices connection
The service returns something like this
{
  "totalSize": 1,
  "result": [
    {
      "id": "557058",
      "type": "user",
      "title": "Alex Medved",
      "wikiLink": "[~sash]",
      "createdDate": {
        ...
      },
      ...
      "username": "sash",
  ...
}
Then we start with form definition . We will have a very simple form for demo purposes and here is how it looks like
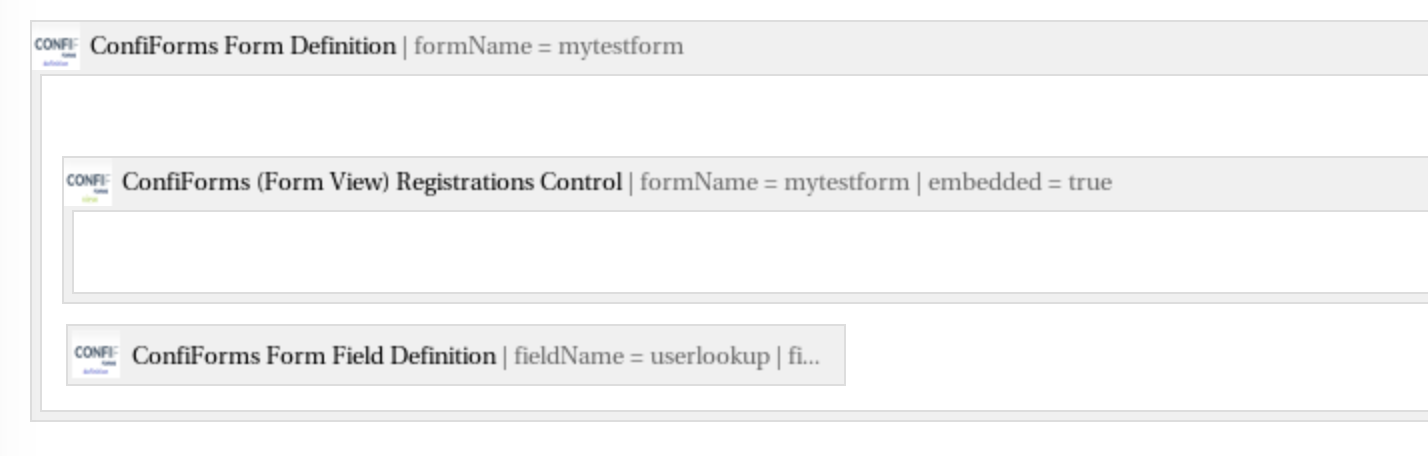
Just one field - we call in "userlookup" as you can see, and it is configured as follows
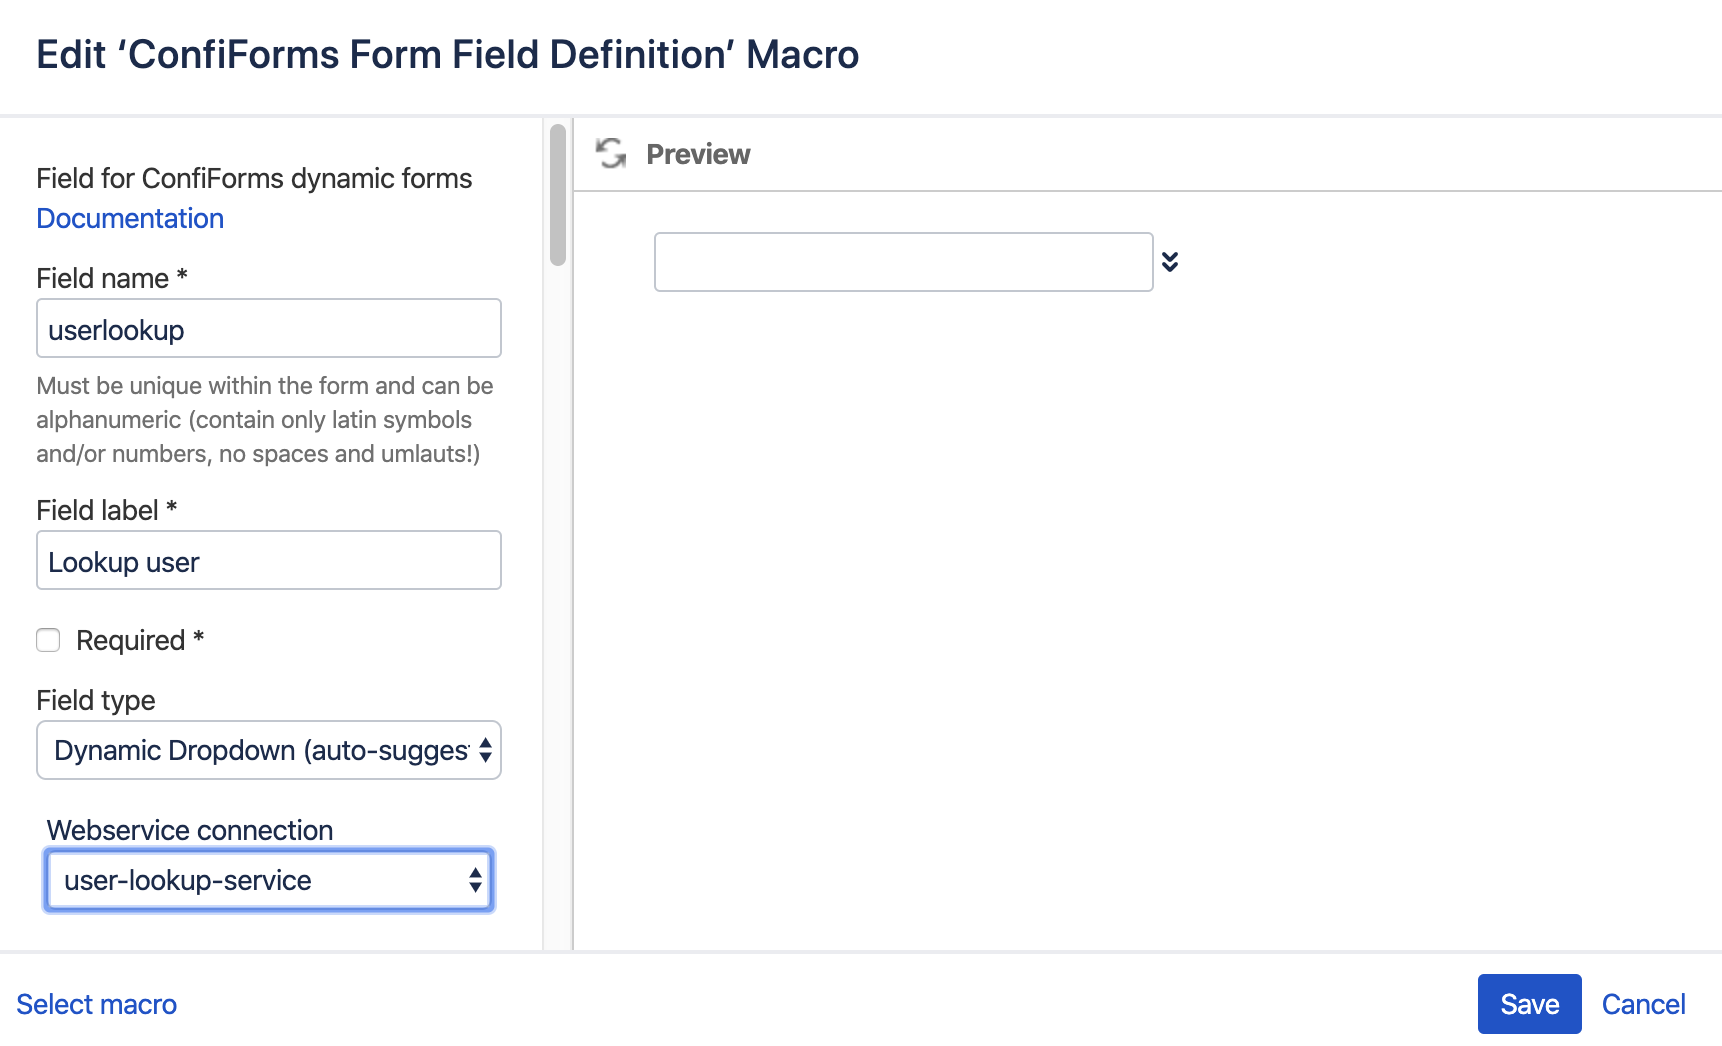
It is important that we send the value of a "userlookup" field to our service
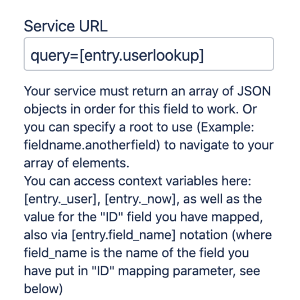
And the mapping is as follows (see what get's returned by the service - JSON snippet above)
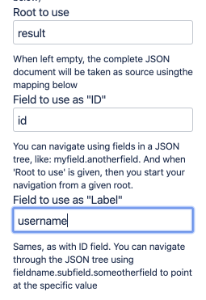
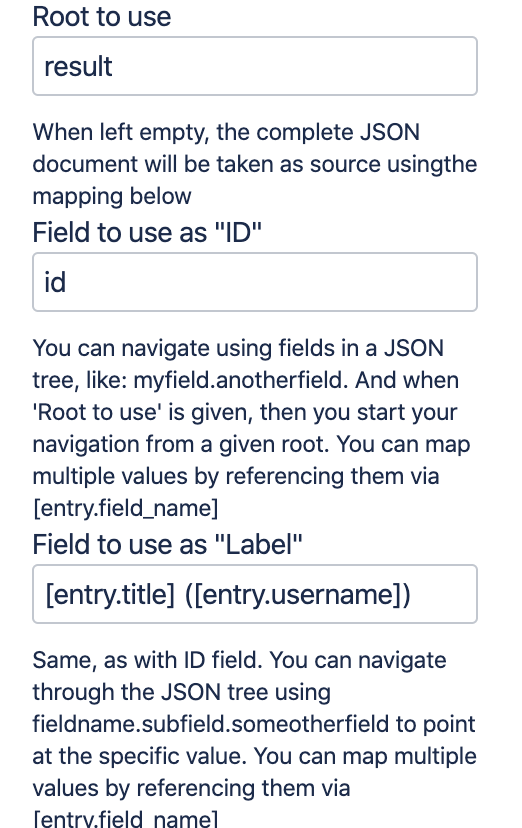
We take the "result" as a root element to look in and get the property value for "id" and for "username"
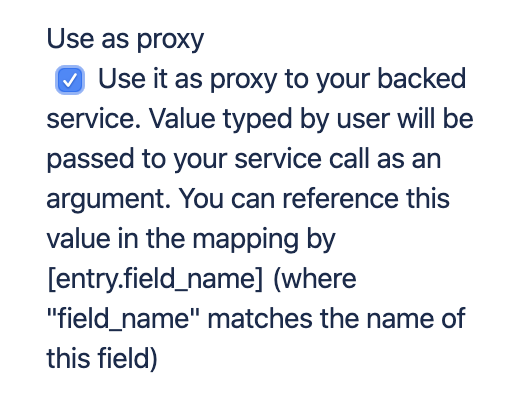
And setting the field to act as proxy to your underlying service
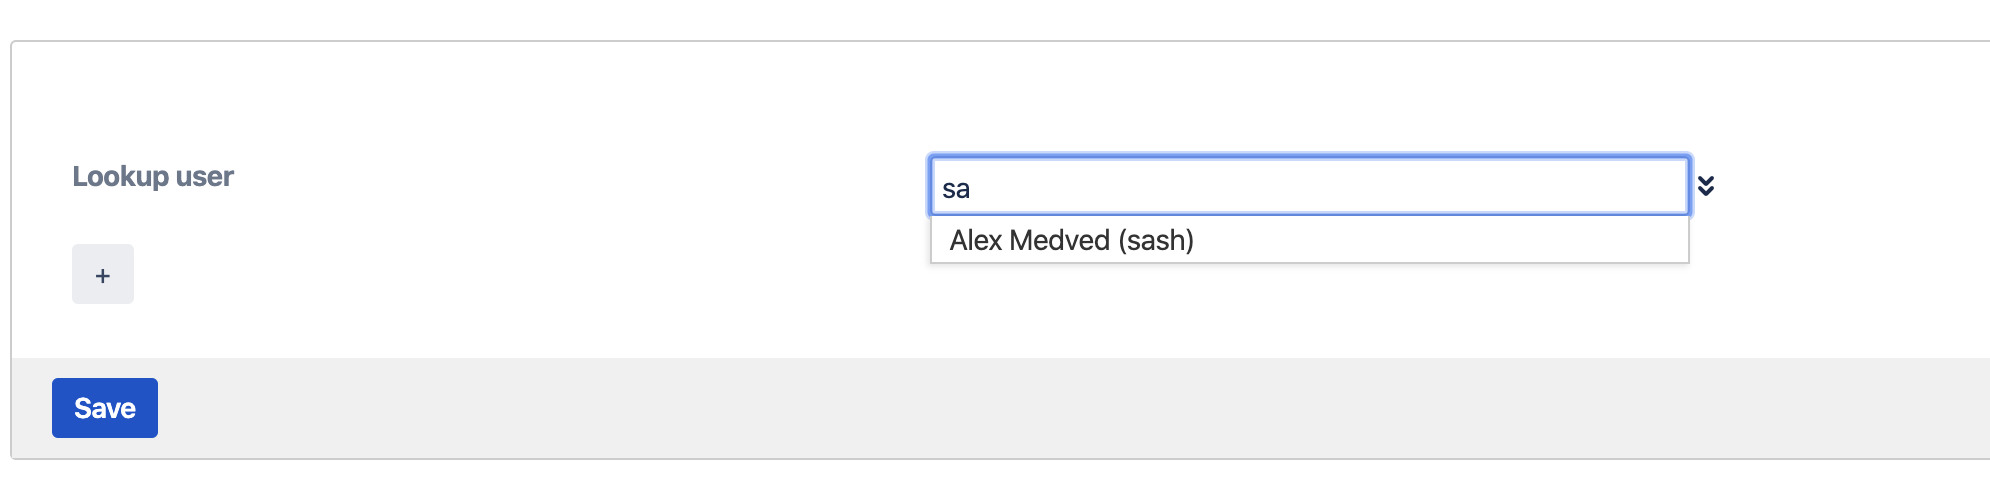
The end result will be like this

You can also have multiple values mapped to id or label and this is done by referencing the field values via [entry.field_name] notations. For example, if we want to show title together with username as label we can do the following
And the end result will be something like this
Overview
Content Tools