This is the documentation for ConfiForms Server/Data Center app
However, this might also work for ConfiForms cloud and in most cases it does. But please see this page to understand the differences between server and cloud versions of the ConfiForms app.
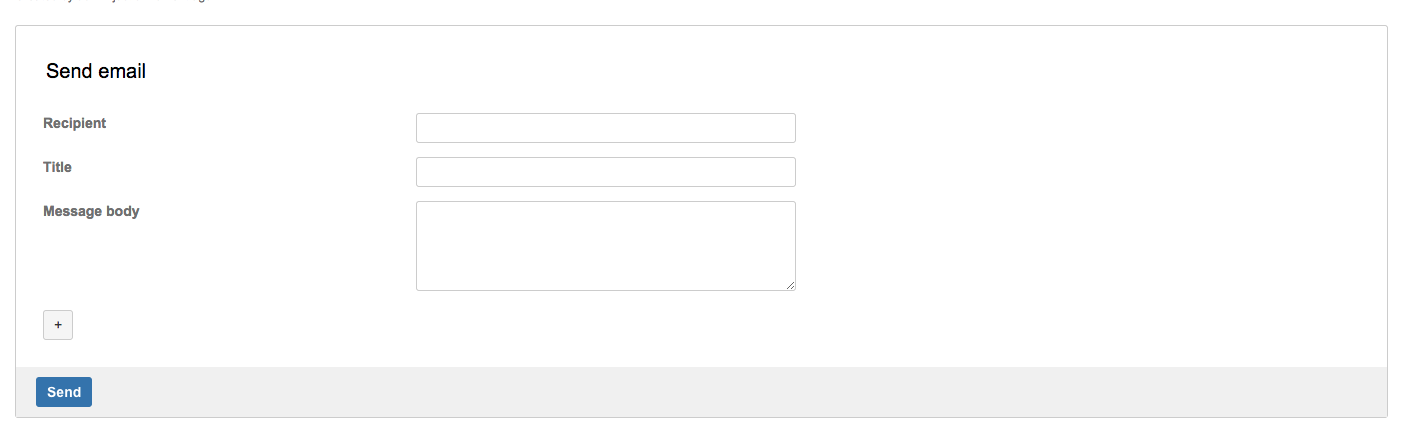
In this tutorial we will create a simple embedded form and show how to use IFTTT macro to send emails based on the data entered into the form
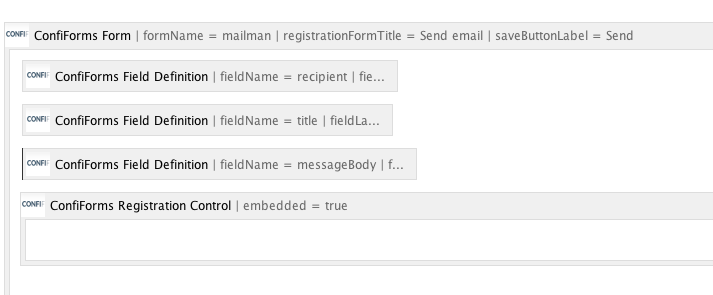
- ConfiForms Form - the main container for your form
- ConfiForms Registration Control
- ConfiForms Field Definition - we will have 3 of these, one for recipient field, one for title and another one for message body
- ConfiForms IFTTT Integration Rules macro - to define when and how we will send an email based on the data entered into the form
Here is how the form definition looks like
- recipient field definition is of type text
- title field definition is of type text
- messageBody field definition is of type textarea
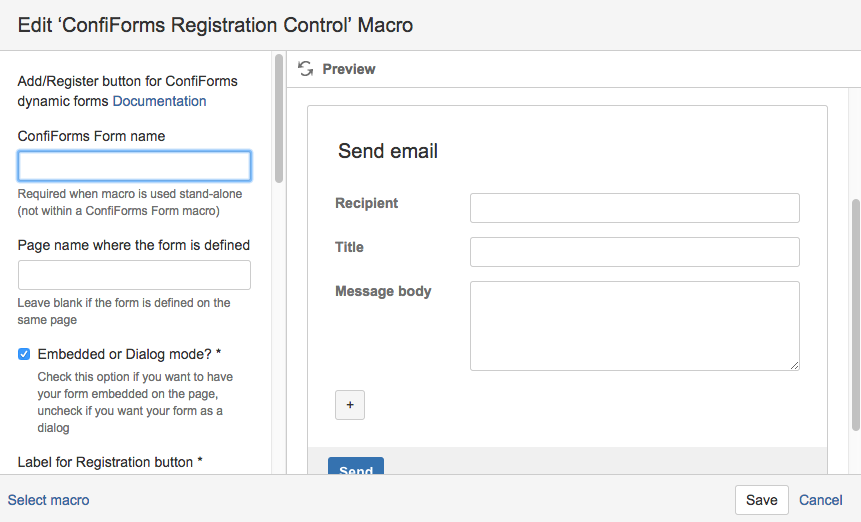
"ConfiForms Registration Control" macro defines how the form definition should be shown: embedded or as dialog, with custom layout or not (with standard, card view - which is the default)
As we want to make the form embedded to the page we shall set "embedded" parameter to true for "ConfiForms Registration Control" macro, like this:
Now we shall define the IFTTT macro to listen to the event when a record in the form is created and send an email based on the data entered.
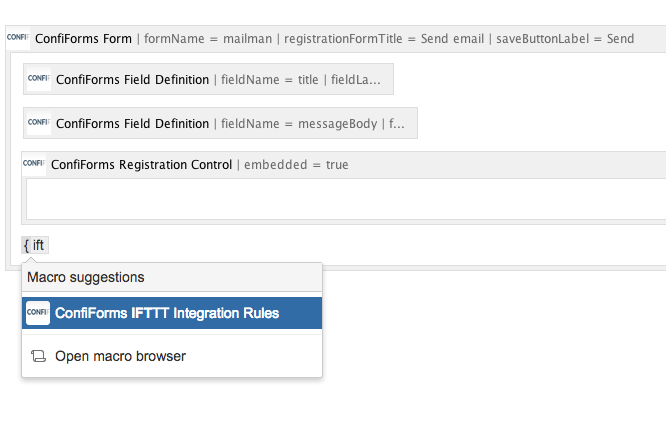
Here are couple of screenshots to show how this is done:
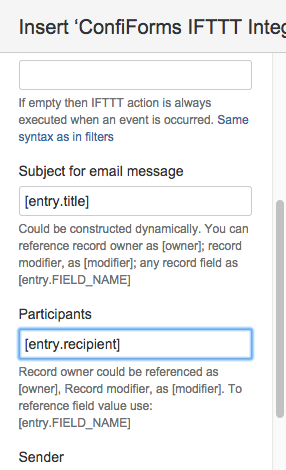
We make references to Form fields in IFTTT macro parameters
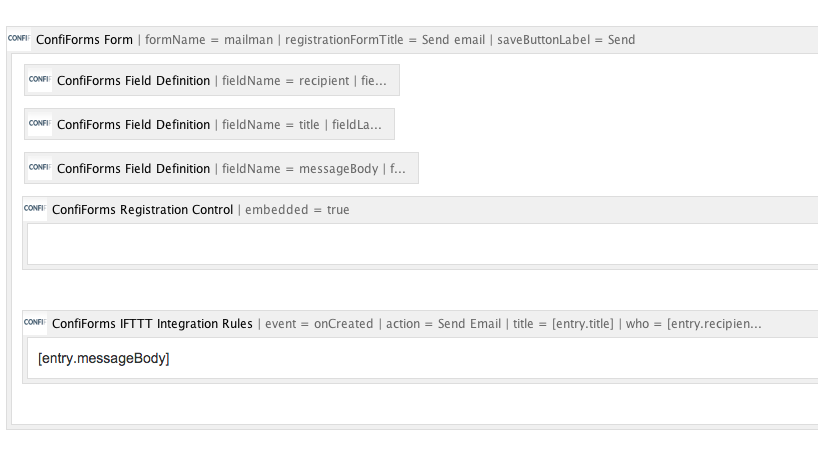
and we reference "messageBody" field in the IFTTT macro body. This will be used as email message body (substituted with the value entered before sending the email)
And here is how the form looks like on the Confluence page
Of course we can add some validations to the fields, set them as required and much more. But this is out of the scope of current tutorial.